Remove Silence from Video Automatically in DaVinci Resolve
Aug 30, 2021Remove silence and meaningless video from your timeline in TimeBolt and export into DaVinci Resolve. Multi-track audio still exports to separate tracks in Resolve.
Follow these steps in order:
1. Add video to TimeBolt and dead-air is auto detected. Use the timeline editor to cut or keep any part. Speed up preview speed. Learn a few quick keys and you'll never do cut work in an NLE again! How to Edit TimeBolt Timeline

2. Export XML from TimeBolt. The XML file instructs Resolve what to cut and keep.

3. Open a New Project In Resolve and add the raw source file. The project clips will have different frame rates so click 'Change'
4. Right click on 'Click Attributes' and set the FPS to the Frame Rate shown in the XML file name extension saved by TimeBolt.
5. In Resolve select your source file, go to File --> Import Timeline --> double click your XML file
6. Under 'Load XML' Settings:
- uncheck 'Automatically Import Source Clips into Media Pool'
- Set Mixed Frame Rate Format to 'Resolve'
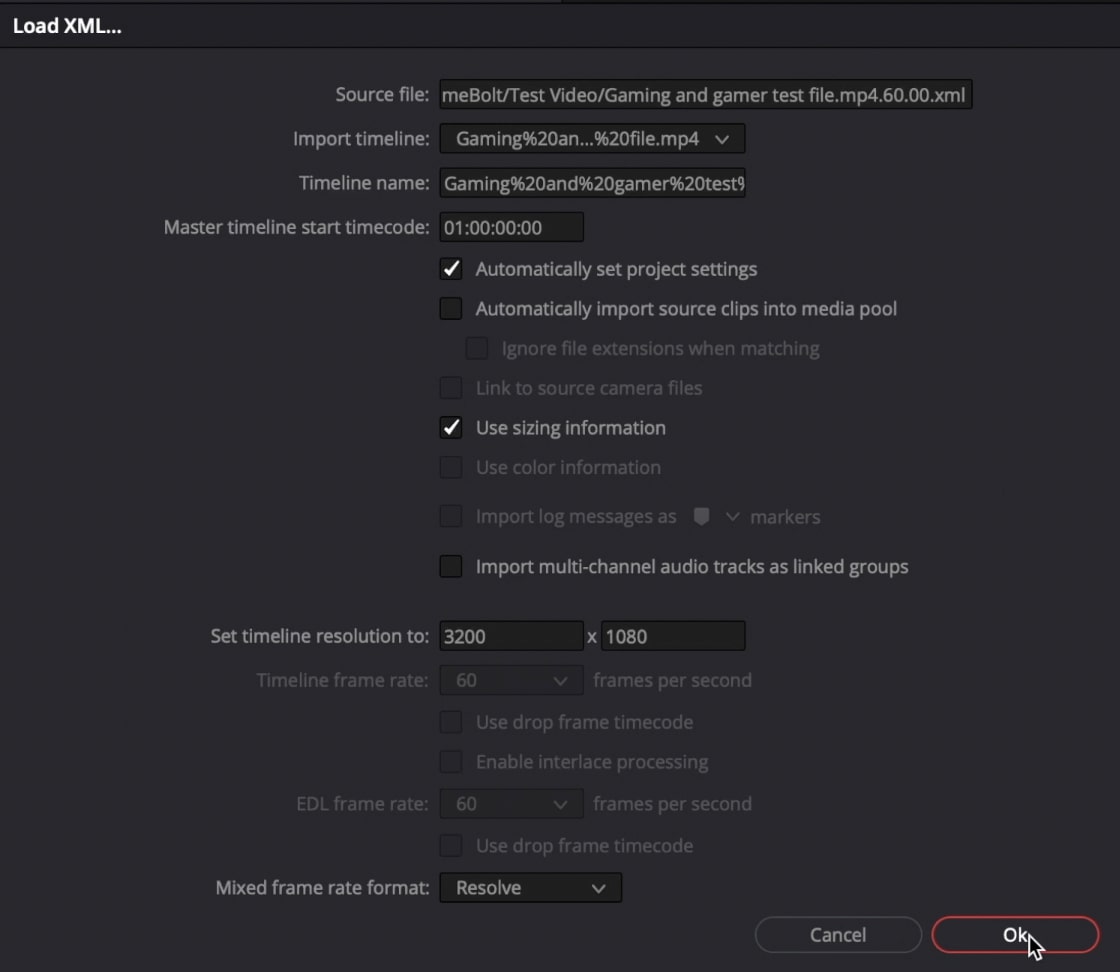
7. Close any error message. It won't matter.
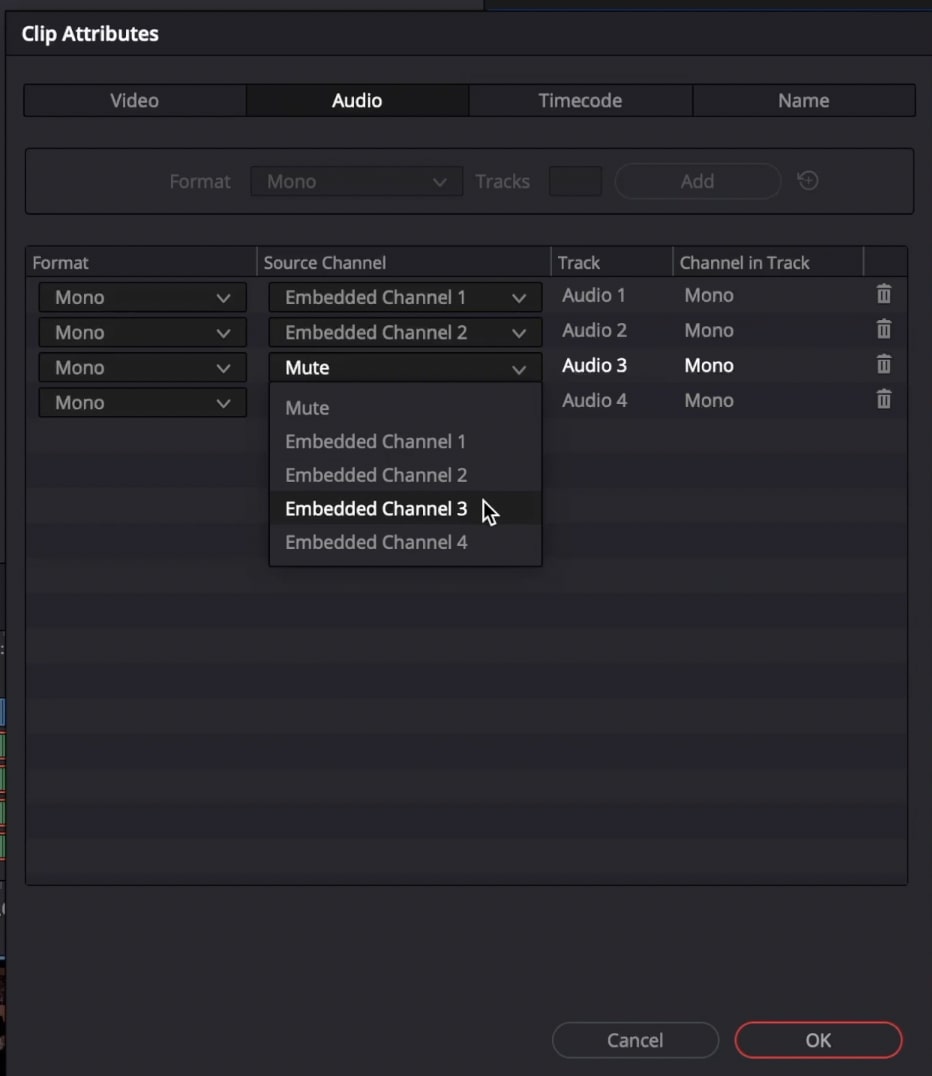
8. Finally, you must turn on the audio manually. Simply select both audio tracks, right click and select 'Clip Attributes', go to 'Audio' tab, then embed channel one and channel two.
You now have a fully cut timeline to add additional visual effects and color grading in DaVinci Resolve 480% faster than you can do by hand.
TimeBolt also supports Final Cut Pro, Adobe Premiere (Plugin and XML), and render to export clips direct into iMovie and Camtasia.
